
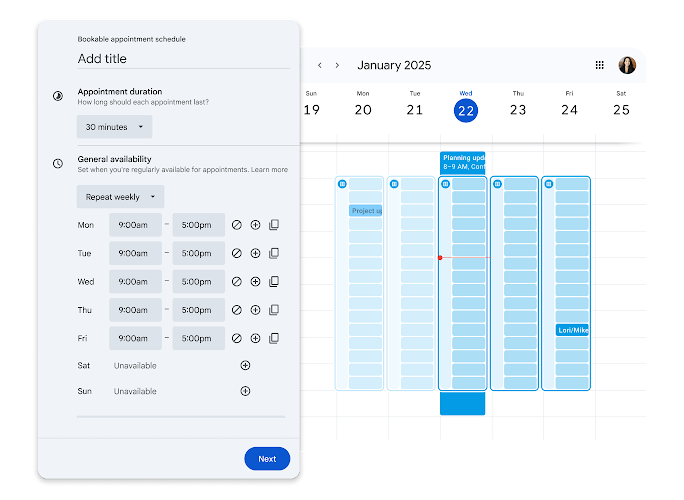

Efficient time management is a fundamental pillar of productivity for any organization. Losing valuable minutes coordinating times through back-and-forth emails slows down your operations. Google Calendar offers a feature designed to simplify this process: Appointment booking pages (or appointment schedules).
At G Nerd, as a Google partner focused on operational efficiency and tool training, we explain how to set up your own booking page so your clients or team members can schedule meetings directly based on your real-time availability.
Differences between Appointment schedules and traditional Appointment slots
Before getting started, it is important to understand the functional difference within the platform:
- Appointment slots (Legacy feature): Allowed booking space within a primary calendar internally, but lacked an independent web interface or advanced confirmation controls.
- Appointment booking page (Current appointment schedules): Generates a professional, public webpage. It allows anyone inside or outside your organization to book an appointment without seeing your personal calendar, automatically syncing availability in real time and avoiding overlapping bookings.
3 steps to create your first appointment schedule
Setting up a booking page in Google Calendar takes only a few minutes. Follow these steps on your computer:
Step 1: Create the appointment schedule
- Open Google Calendar in your browser.
- Click the + Create button in the top left corner.
- Select the Appointment schedule option.
Step 2: Configure duration and availability
- Assign a professional title to your booking page (for example: “Technical Consulting – G Nerd” or “Workspace Advisory Session”).
- Set the appointment duration (minimum of 15 minutes).
- Define your availability window by setting the specific days and times you want to take meetings.
- Adjust the scheduling window to determine how far in advance appointments can be booked (for example, from 60 days in advance up to 4 hours before the session).
- Configure buffers or break times between meetings to prevent back-to-back sessions without a pause.
Step 3: Add location details, booking form, and reminders
- Location and video conferencing: Choose whether the meeting will take place via Google Meet, in person, or by phone call.
- Booking form: Set the fields the attendee must complete when booking (first name, last name, email address, and custom questions).
- Email reminders: Configure automated confirmation and reminder emails prior to the appointment to reduce no-show rates.
- Click Save.
How to share your booking page
Once your schedule is saved, you can share the link in several ways:
- Direct link: Copy the URL of your booking page and share it via email, email signature, or messaging apps.
- Embed on your website: Copy the provided HTML code to embed a booking button or the full calendar view directly on your company’s website.
Optimize your company’s management with G Nerd
Making the most of tools like Google Calendar elevates your business image and reduces your team’s operational overhead. At G Nerd, we guide you through integrating Google Workspace applications, setting up security policies, and delivering customized technical training.