Slides (Presentations)
Create your first presentation in Slides.
Create or import a presentation.
Create your presentation.
- Open the Slides home screen in Google Slides.
- In the top left, under “Start a new presentation,” click New Plus. This will create and open your new presentation.
Import and convert an existing presentation.
Converting your file from another program will create a copy of your original file in Docs, Sheets, or Slides format. You can then edit the file in your browser.
If you have existing files, you can import and convert them to Docs, Sheets, or Slides.
- Go to Drive.
- Click New and then File upload.
- Choose the file you want to import from your computer to add it to Drive.
Follow these steps to open your file:
- Once the upload is complete, click “Show file location.”
- Find the file and right-click it.
- Select “Open with” and choose Google Docs, Sheets, or Slides, as appropriate.
Microsoft files in Drive?
If you have Microsoft files saved in Drive, you can edit them directly without needing to convert them.

Add slides to your presentation.
- Add a slide with the same layout as the current slide.
- On your computer, open a presentation in Google Slides.
- In the top left, click New slide Plus.
Add a slide with a different layout.
- On your computer, open a presentation in Google Slides.
- In the top left, click New slide with layout Down arrow.
- Choose a slide.
Note: If you don’t see the New slide with layout Down arrow option, click Templates.
Add a slide with your organization’s branding.
- On your computer, open a presentation in Google Slides.
- In the top left, click Templates.
- On the right, click the template you want to use.
Note: The Templates option appears only if your administrator enables organization-branded slides.
Update your presentation.
Choose a theme and layout.
When you first create a presentation, you can choose a theme for your slides. A theme is a preset group of colors, fonts, background, and layouts. The layout of your presentation is how your text and images are organized on a slide.
Change your presentation’s theme.
- On your computer, open a presentation in Google Slides.
- At the top, click Slide and then Change theme.
- On the right, click the theme you want.
Change your presentation’s layout.
- On your computer, open a presentation in Google Slides.
- Select a slide.
- At the top, click Layout.
- Choose the layout you want to use.

Organize slides.
- Move slides: Drag the slide to a different position in the presentation. To move multiple slides at once, hold down the Ctrl key and click multiple slides before dragging them.
- Delete slides: Right-click the slide and select Delete.
- Duplicate slides: Right-click the slide in the sidebar and select Duplicate slide.
Add images, text, speaker notes, and more.
- Rename your presentation: Click Untitled presentation and enter a new name.
- Add images:
- Click Insert and then Image to add images from your computer, the web, Google Drive, and more. You can also move, delete, or resize images.
- Add text:
- Click Insert and then Text box to add new text boxes.
- Then, click a text box to enter text.
- You can move, delete, or resize text boxes.
- You can also change how text wraps in a box.
Add videos, shapes, charts, and more:
- Click Insert to add videos, shapes, charts, slide numbers, and other features to your presentation.
- You can also move, delete, or resize these inserted features.
Add speaker notes:
- Use speaker notes to keep track of your talking points for each slide.
- In the presentation editor, speaker notes appear below the current slide.
- When you present your slides, your speaker notes will appear in a separate window.

Generate a new slide with Gemini.
Use Gemini in Slides to generate a new slide with images and content. Use this slide as a starting point.
Generate a new slide with Gemini.
You can use the Gemini sidebar in Slides to generate a new slide.
- On your computer, open Google Slides. New slides will be generated using your current theme.
- At the top, click Ask Gemini.
- In the sidebar, select a suggestion or create your own. To create a suggestion with your file name, insert @ before the name.
- For example, Create a slide about how to optimally train for a marathon
- Create a slide about the @Company Goals 2026 presentation.
- From the generated slide, you can:
- Get a different version: From the menu, click Retry.
- Add the slide to your presentation: From the menu, click Insert.
- Refine the generated slide: From the menu, click Close. In the sidebar, type a new suggestion.
- Send feedback: From the menu, click Good suggestion or Bad suggestion.
Share a presentation
Present your slides
To present a presentation full screen in Google Slides:
- Open a presentation in Google Slides.
- In the top right, click Present. For best results, present with Google Chrome.
- From the current slide, the presentation will go full screen. To change slides, use the arrow keys on your keyboard or click the arrows at the bottom of the presentation.
- To exit full screen, press the Esc key.
View a presentation with speaker notes
- Open a presentation in Google Slides.
- In the top right corner, next to Present, click the down arrow.
- Click Presenter view.
- Click Speaker notes.
Perform other actions while presenting
- When presenting, you can choose more options from the toolbar at the bottom of the presentation window:
- Select slides to present from a list
- Open “Presenter” view
- Activate the laser pointer
- Print the presentation
- Download the presentation in PDF or PPTX format
Share a presentation
Share a presentation with specific people
Note: Sharing options vary depending on the group size:
- Up to 100: Allow up to 100 people with view, edit, or comment permissions to work on a Google Docs, Sheets, or Slides file at the same time.
- 100 or more: When 100 or more people are accessing a file, only the owner and a few users with edit permissions can edit the file. To allow more than 100 people to view your file at the same time, publish it as a web page.
Important: If you use a Google Account through work or school, you may not be able to share files outside your organization.
- On your computer, go to Google Drive.
- Select the file you want to share and then Share Add approver.
- Enter the email address you want to share with. If you use a work or school account, you can share with suggested recipients.
- Tip: To turn off suggested recipients, go to your Drive Settings Settings. Uncheck “Show suggested recipients in the sharing dialog.”
- Decide how people can use your file. Select an option:
- Reader
- Commenter
- Editor
- If you use an eligible work or school account, click Add due date to add a due date.
- When you share your file, each email address will receive an email.
- Optional: Add a message to your notification email.
- If you don’t want to notify people, uncheck the box.
- Click Send or Share.
- Optional: Add a message to your notification email.

Share a link to a presentation
You can choose whether your file should be available to anyone or restricted only to people with access. If you allow access to anyone with the link, your folder will not restrict who can access it.
- Select the file you want to share.
- Click Share or Share Share.
- Under “General access,” click the down arrow.
- Choose who can access the file.
Tip: If you use your Google account for work or school, you can choose to share files and folders only with a specific audience, such as your department. You may find a description of each audience when you hover over the group name.
- To decide what role people will have with your file, select Reader, Commenter, or Editor.
- Learn more about how others view, comment on, or edit files.
- Click Done.
Stop sharing a presentation
Stop sharing a presentation you own
- Find the file or folder in Google Drive, Google Docs, Google Sheets, or Google Slides.
- Open or select the file or folder.
- Click Share or Share Share.
- Find the person you want to stop sharing with.
- To the right of their name, click the down arrow and then Remove access.
- Click Save.

Remove a link to a presentation you own
- Find the file or folder in Google Drive, Google Docs, Google Sheets, or Google Slides.
- Open or select the file or folder.
- Click Share Share or Share Share and then Copy link.
- Under “General access,” click the down arrow.
- Select Restricted.
- Click Done.
Comment on a presentation
- On your computer, open a document, spreadsheet, presentation, or video.
- Highlight the text, images, cells, slides, or scenes you want to comment on.
- To add a comment, in the toolbar, click Add comment Add comment.
- Type your comment.
- Click Comment.

Chat with collaborators on a presentation
- On your computer, open a document, spreadsheet, or presentation.
- In the top right, click Show chat Chat. This feature will not be available if you are the only one in the file.
Tip: If there are many collaborators on the file, in the top right, to the right of the avatars, there will be a blue circle showing the number of additional collaborators. Click the blue circle and then Join chat Chat.
- Type your message in the chat box.
- When you’re done, in the top right of the chat window, click Close Close.
Note: All chats in Google Docs, Sheets, and Slides include anyone viewing the file. Chats are not saved.

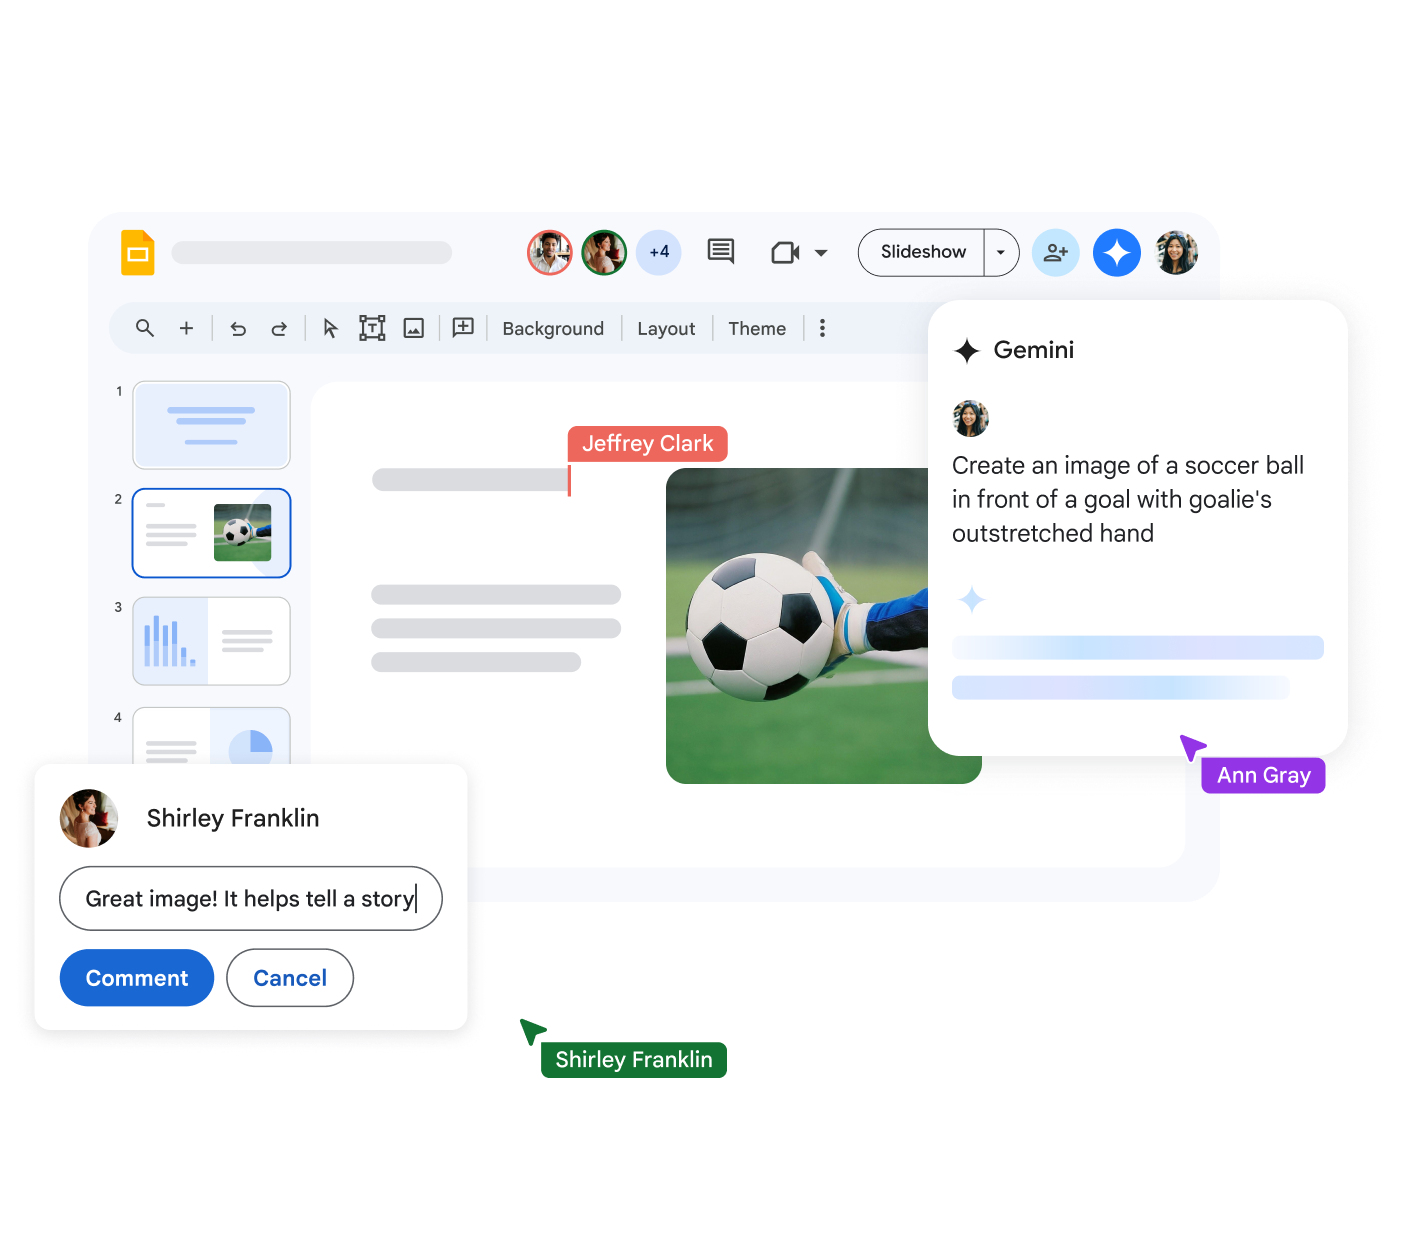
Gemini commands in Slides
- On your computer, open a presentation in Google Slides.
- Click the slide where you want to add the image.
- At the top, click Insert and then Image and then Create image with Gemini AI.

- In the right panel, enter a prompt.
Tip: For best results, consider including the subject, setting, distance to subject, materials, or background. For example:
- A close-up of a wooden boat on a lake surrounded by trees at sunrise.
- (Optional) You can click Add a style to customize the image you create.
- Click Create to see several suggested images.
- (Optional) Edit your prompt: At the top of the right panel, click the prompt. Edit your prompt and click Create.
- See more suggested images: Click See more.
- When you’re done, click Insert.