Sites
Create your first Site with Google Sites
Create a site
When you create a new site, it’s added to Drive, just like other Drive files. Sites automatically saves every change you make, but your site isn’t public until you publish it.
Create and name your site
The name you create here is the document name that appears in Google Drive. The document name is only visible to you.9
- Choose an option:
- In Sites, at the top, click Blank or Template gallery and select a template.
- In Drive, click New, then More, then Google Sites.
- In the top left, enter a document name for your site and press Enter.

Add a site title
The site title appears in the header and in the web or mobile window’s title bar after you publish the site. You need to have 2 or more pages on your website for the site title to appear.
- On a computer, open a site in the new Google Sites.
- In the top left, click Enter site name.
- Enter your site’s name.
- Press Enter or Return.

Add and organize pages on your site
Add a page
- On a computer, open a site in the new Google Sites.
- On the right, click Pages.
- In the bottom right, hover over Add New page.
- Click New page Add.
- Enter the page name.
- Click Done.
- To publish your changes, in the top right, click Publish.
Move a page
You can move a page under another page to create a subpage.
- On a computer, open a site in the new Google Sites.
- On the right, click Pages.
- Drag the page where you want to move it.
- To publish your changes, in the top right, click Publish.
Create a new subpage
To create a new subpage:
- Click Pages.
- Choose a page and click More
- Then Add subpage.
Tip: You can create up to 5 levels of subpages.
Copy or delete a page
- On a computer, open a site in the new Google Sites.
- On the right, click Pages.
- On the page you want to duplicate or delete, click More More.
- To copy a page, choose Duplicate page.
- To delete a page, choose Delete.
- Tip: You can recover deleted pages by restoring an earlier version.
- To publish your changes, in the top right, click Publish.
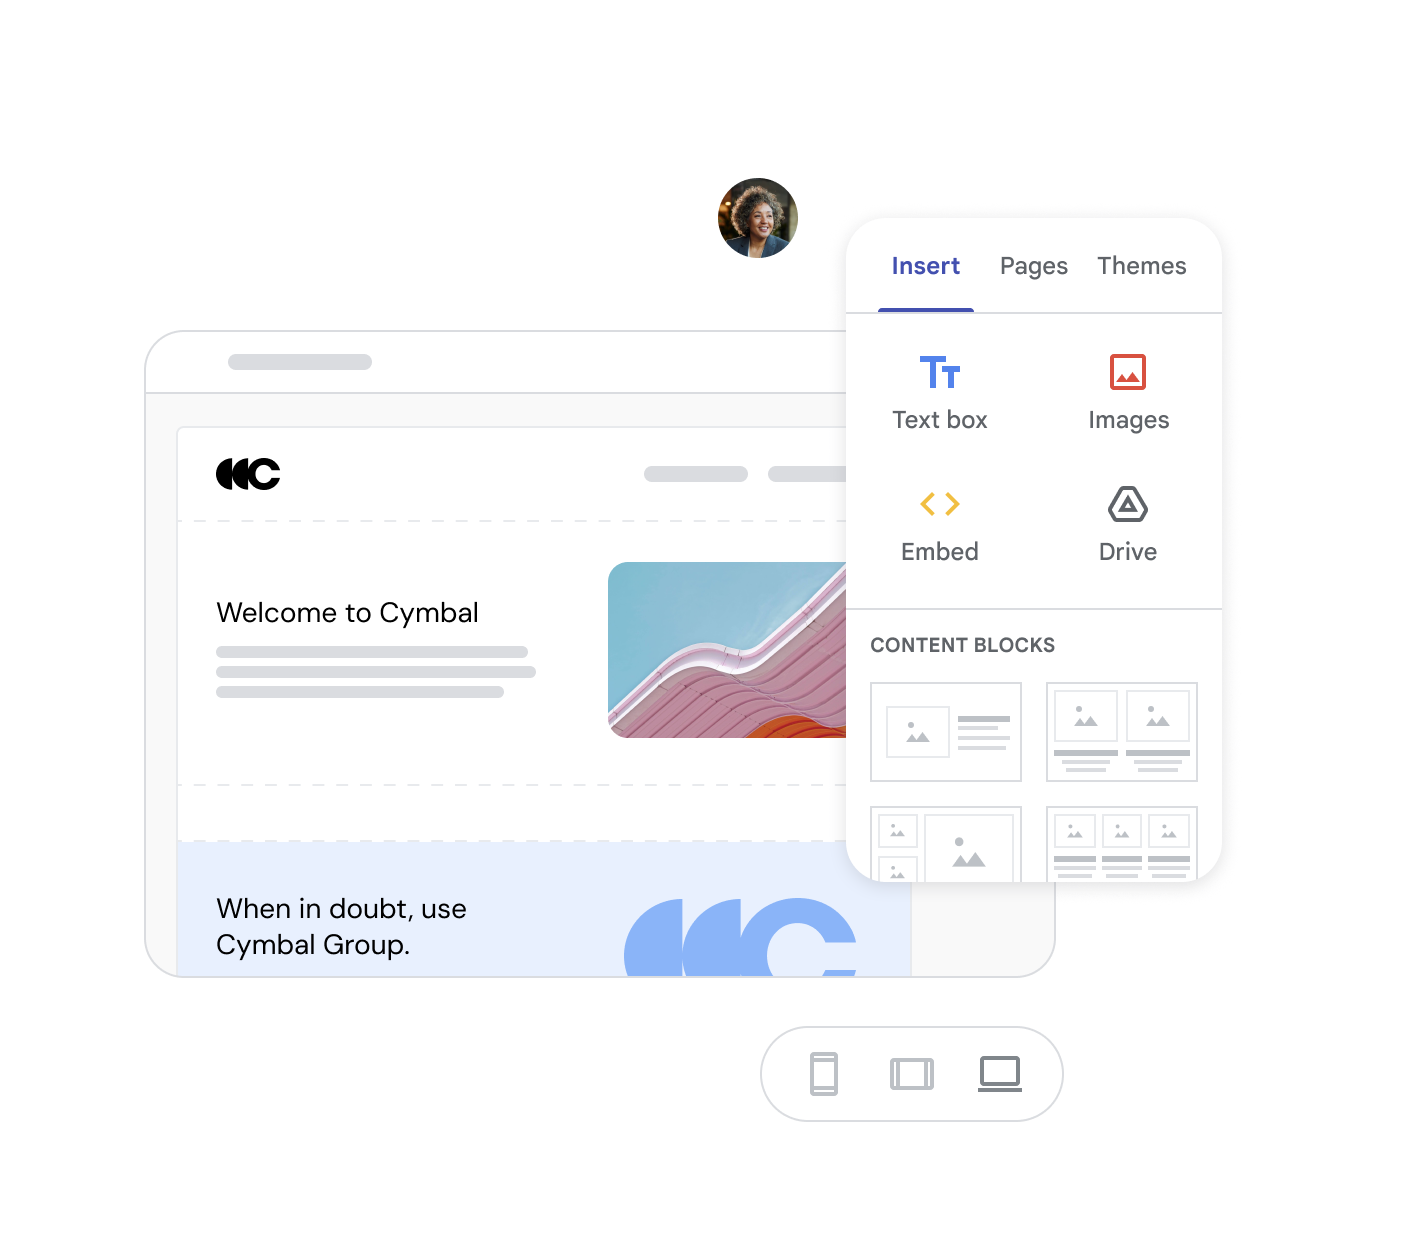
Add text and images to pages
Add text or headings
- On a computer, open a site in the new Google Sites.
- On the right, click Insert, then Text box.
- In the menu, click the down arrow and then choose the text, heading, or title style you want.
- Add your text to the box.
- To publish your changes, in the top right, click Publish.

Add an image
You can add images in .png, .jpg, or .gif format.
- On a computer, open a site in the new Google Sites.
- On the right, click Insert, then Images.
- Choose where to get your image.
- Choose an image and click Open or Select.
- To publish your changes, in the top right, click Publish.
Add a section layout
- On your computer, go to a site in the new Google Sites.
- On the right, click Insert.
- Under “Content blocks,” drag the layout you want to your page.
- Add text, images, documents, or videos.
- In the top right, click Publish.
Continue designing your page
You can add many more elements to a page in Google Sites, such as:
- Collapsible text
- Buttons
- Search bar
- Image carousel
- Social media links
Change your site’s appearance
Add a pre-made theme
- On a computer, open a site in the new Google Sites.
- On the right, click Themes.
- Under “Created by Google,” select a pre-made theme.

Add a custom theme
- On a computer, open a site in Google Sites.
- In the right panel, click Themes.
- Under “Custom,” select Create theme More.
- Enter a name for your theme.
- Select Next.
- You can also add a logo and banner image.
- Select a color palette, then Next.
- To choose specific colors for different parts of your site, select Customize colors.
- Choose your fonts.
- Select Create theme.
- In the right panel, you can continue customizing your theme.
Import a theme from another site
- On a computer, open a site in the new Google Sites.
- On the right, click Themes.
- Under “Custom,” select Import theme.
- Select any site, then Select a theme.
- Click Import theme.

Preview your site
- On a computer, open a site in the new Google Sites.
- At the top, click Preview.
- In the bottom right, choose a layout option.
- To exit, in the bottom right, click Exit Exit preview.
Allow people to review your site
Before publishing your site, you can allow people to review and edit your site.
Important: If you use a Google Account through work or school, your administrator may limit your ability to add an editor.
- On a computer, open a site in the new Google Sites.
- At the top, click Share Share with others.
- Under Share with people and groups, enter an email address.
- Click Editor.
- Editors with a non-Google account can view a draft of your site, but they cannot edit it.
- To view a draft, an editor with a non-Google account must enter a verification code. You’ll receive an email with this code when you’re invited to be an editor.
- Editors with a Google Account can view and edit your site without a verification code.
- Click Done.
Publish your Site
Specify who can view your Site
- On a computer, open a site in the new Google Sites.
- At the top, click Share Share with others.
- Next to “Published site,” in the dropdown list, select Restricted or Public.
- If you use Sites for work or school, you may find other options.
- Click Save or Done.
- If you selected “Restricted,” share your site with specific people and add groups. Enter the name or email address of the person you want to add, then click the dropdown menu, then Published reader, then Send.
- To send an email notification to the person or group, check “Notify people.”
Note: If you use a Google Account through work or school, your administrator may limit who you can share your site with.
Publish your site.
- On a computer, open a site in Google Sites.
- At the top, click Publish.
- Under Web address, enter a public site name for your site’s URL.
- Note: Terms that violate our Acceptable Use Policy will not be allowed.
- Click Publish.
- (Optional) Visit your site to make sure it published correctly.

When you publish a site created with the new Google Sites, the site’s web address is sites.google.com/domain/sitename, where sitename is the site name you enter above.
Tip: To use a web address that is currently in use or has been used in the past for a site you own, change the address or permanently delete the existing site.
Change your site’s URL.
Change the last part of the URL.
- On a computer, open your site in the new Google Sites.
- In the top right, next to “Publish,” click the dropdown menu Down, then Publishing settings.
- Under “Web address,” enter the desired URL.
- Click Save.
Use a custom URL.
You can make it easier for people to find and remember your site with a web address like www.yourdomain.com (where yourdomain is a domain name you own).
Note: When you use Google Sites with a work or school account, you must have administrator access to create a custom web address. Learn how in the Google Workspace Admin Help Center.
Search for sites
In the new Google Sites, you can use the search bar at the top to find shared sites you can edit.
Tip: If you use a work or school account, you can search for published sites shared with you. Create Websites for your Projects without Writing Code with Google Sites