Gmail
Gmail stores your email in the cloud, allowing you to access your messages from any computer or mobile device with a browser. In addition, you can start or join video calls, access your chats, and find and organize important emails.
Initial Setup:
Add your profile picture
Open Gmail.
In the top right corner, click your profile picture.
Click Manage your Google Account.
On the left, click Personal info.
Under Basic info, click the profile picture.
Select a photo.
- Optional: Crop the photo.
Click Set as profile picture.
Create a signature
Open Gmail.
In the top right corner, click Settings.
Click See all settings.
Under the General tab, scroll down to Signature, and click Create new.
Name your signature and then click Create.
- This name is not your signature itself, it’s a name for the signature template.
In the text box to the right, add your signature text.
- Optional: To add text colors, links, and images, use the formatting bar.
At the bottom, click Save Changes.

Turn on Chat and Meet in Gmail
Open Gmail on your computer.
Go to the top right corner and click Settings. Then, select See all settings.
At the top, click Chat and Meet.
Next to Chat, click Google Chat.
Next to Meet, click Show the Meet section in the main menu.
Click Save changes.
Move the Chat panel in Gmail
The Chat panel in Gmail can be located on the right or left of the inbox.
Open Gmail on your computer.
Go to the top right corner and click Settings. Then, select See all settings.
At the top, click Chat and Meet.
Next to “Chat position,” select Left of the inbox or Right of the inbox.
Click Save changes.

Set up Gmail notifications
To access general settings, find the Settings icon in the top right corner and click See all settings.
Scroll down to the Desktop notifications section.
Click “Click here to enable desktop notifications for your organization.”
Select “New mail notifications on” or “Important mail notifications on”.
At the bottom of the page, click “Save Changes”.
Notifications are available for: Chrome, Mozilla Firefox and Apple Safari when you are signed in to Gmail and it is open.

Set up Gmail to use offline
Only in the Chrome browser
On your computer, make sure you have downloaded Chrome. You can only use Gmail offline in a Chrome browser window, not using incognito mode.
Go to Gmail Offline Settings.
Check “Enable offline mail”.
Choose your settings, such as how many days of messages you want to sync.
Click Save changes.
Enable Gmail offline on each device for which you want offline access.

Set up automatic replies (Out of office)
Open Gmail.
In the top right corner, click Settings → All settings.
Find the Vacation responder section by scrolling down.
Select Vacation responder on to enable the feature or Vacation responder off to disable it.
If you enabled the vacation responder, enter the dates you will be away and add a message. Then, select who should receive a reply.
At the bottom, click Save changes.

Start sending Emails
Create and send an email
On your computer, go to Gmail.
In the top left corner, click Compose.
In the “To” field, add recipients.
- You can also add recipients:
- In the “Cc” and “Bcc” fields.
- When composing a message, with a “+” or “@mention” sign and the contact’s name in the text field.
- You can also add recipients:
Add a subject.
Write your message.
At the bottom of the box, click Send.
Write a new draft with Gemini in Gmail

On your computer, open Gmail.
In the top left corner, click Compose.
- You can also reply to an email thread.
In the bottom left corner of the box, select “Help me write”.
Enter a prompt. For example:
- “A thank you letter for my job interview”
- “A birthday invitation for my son, who will be 5 years old.”
- “Ask my friend for restaurant recommendations in Toronto”
Click Create.
- Optional: After generating your draft, click:
- Recreate: Generates a new draft based on your prompt.
- Refine: Revises the draft text.
- Formalize: Makes the draft more formal.
- Elaborate: Adds additional details to the draft.
- Shorten: Shortens the draft.
- Optional: After generating your draft, click:
If your draft looks good, click Insert.
Tip:
- For better results, include:
Recipient
Topic
Tone you want to express in your prompt
For example, “An apology to my son’s teacher for his absence”
- To get a draft you like, you may need several attempts.
- To send a different prompt:
In the top right corner of the draft, tap Close.
Enter a new prompt.
Refine a draft with Gemini in Gmail.

Open Gmail on your computer.
In the top left corner, click Compose.
- You can also reply to an email thread or open an existing draft.
Write the message.
At the bottom left of the box, select “Help me write”.
Choose an option:
- Polish: Refines your draft.
- Formalize: Makes the draft more formal.
- Elaborate: Adds additional details to the draft.
- Shorten: Reduces the draft.
Optional: After refining your draft, click:
- Recreate: Generates a new draft.
- Refine: Revises the text again.
If your draft looks good, click Insert.
Compose in a new window and resize
Tip: To open the compose window with a keyboard shortcut, simply type c.
On your computer, go to Gmail.
In the top left corner, click Compose.
- Optional: You can select a window size in the top right corner.
Add a subject and recipients (To, Cc, or Bcc).
Turn off conversation view
Gmail organizes replies to an email into conversations, showing the most recent message at the end. However, it’s possible to turn off this view to have emails individually. This option can be enabled again whenever you want.
On your computer, open Gmail.
In the top right corner, select Settings and then See all settings.
Scroll down to the “Conversation view” section.
Select Conversation view on or Conversation view off.
At the bottom, click Save changes.
Reply and forward
- To reply to a single email or the last email in a thread:
- Click Reply.
- To reply to an email within a thread:
- Click Reply all.
- To forward a single email or the most recent message within a conversation:
- Click Forward.
- To forward an email within a thread
- Click More → Forward.
- To view the previous email in a thread.
- Click Show truncated content.
- To forward an entire conversation, at the top.
- Click More → Forward all.
- To use the Smart Reply feature, locate the suggestions at the bottom of the email and click the one you want to use. Before sending, you will have the option to edit the email.
- Change recipients or subjects.

Add and remove recipients
When composing your reply:
- Add recipients:
Click the “To” field.
Enter the recipient’s email address.
- Remove recipients:
To the right of the email address, click Remove.
- Add recipients:
Tip: You can also add a recipient from the body of the email itself, by typing +, followed by the contact’s name.

Edit an email subject
In the Reply type section, select the down arrow and then choose Edit subject.
Enter a new subject.
Print an email
Important: Even if there is a chain of emails in the same conversation, you can print only one of those emails.
On your computer, go to Gmail.
Open the email you want to print.
In the top right of the email, click More.
Click Print.

Print and save attachments
Clicking the attachment opens a full-screen view.
- To print, click Print.
Download an attachment to your computer
On your computer, go to Gmail.
Open a message.
At the bottom of the message, hover over the attachment.
Click Download.

Organize and find emails
Switch from folders to labels
In other email programs, you might have saved emails in folders. In Gmail, use labels to categorize your emails. Labels are like folders, but with a twist: you can apply multiple labels to an email and then find it by clicking on any of its labels in the left panel. You can also search by label.
Use labels to…
Track the status of people’s tasks.
Organize emails by nesting labels like subfolders. For example, create the label Tasks. Under Tasks, create nested labels by person.
Identify emails that need follow-up.
Identify emails that can be read later.
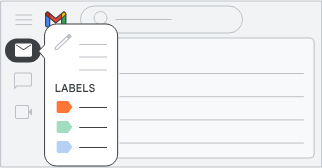
Create a label
On your computer, go to Gmail.
On the left, scroll down, then click More.
Click Create new label.
Name your label.
Click Create.
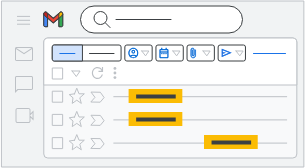
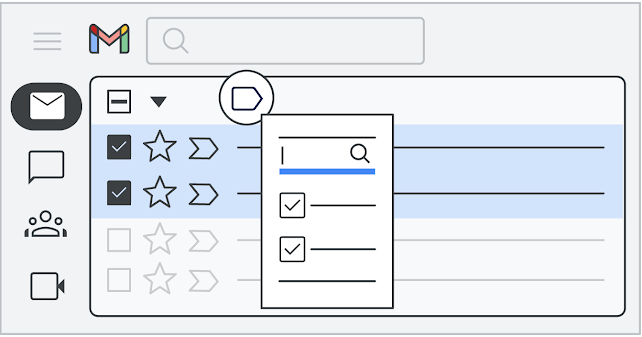
Label messages in your inbox
On your computer, go to Gmail.
Select the messages.
At the top, click Labels.
Select a label or create a new one.
Create rules to filter your email.
You can manage your incoming mail using Gmail filters, for example, to send an email to a label, or to automatically archive, delete, or star it.
To create a filter in Gmail:
Open Gmail.
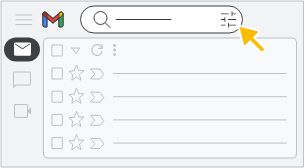
In the top search bar, click “Show search options.”
Enter the desired search criteria. To confirm the search is correct, check the resulting emails by clicking “Search.”
To create a filter, click “Create filter” at the bottom of the search window.
Select the actions you want the filter to perform.
Click “Create filter”.
Note that forwarding filters only apply to future messages. Replies to filtered messages will only appear if they match the original search criteria.
Search your email, chats, or spaces
Open Gmail.
At the top, in the search box, enter your search criteria.
Press Enter.
Choose where to search by clicking Mail, Conversations, or Spaces:
- Mail searches your email.
- Conversations searches existing messages in chats and spaces.
- Spaces searches only the names of spaces you’re a member of, as well as spaces you can join.