Calendar
With Google Calendar, quickly schedule meetings and events and get reminders for upcoming activities, so you always know what’s next. Calendar is designed for teams, so easily share your schedule with others and create multiple calendars that you and your team can use together.
Set up your calendar for Google Workspace
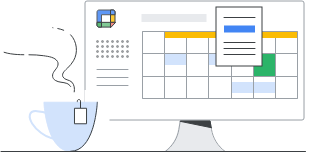
Customize your work week
Choose how many days you see
After choosing a new view, it will become your default view until you change it.
- On your computer, open Google Calendar.
- In the top right, choose a view type:
- Day
- Week
- Month
- Year
- Agenda
- 4 days
Further customize your Calendar view
Set the start of your calendar week, define a custom view, and use an alternative calendar.
- On your computer, open Google Calendar.
- In the top right, click Settings.
- On the left, click View options.
- Choose your settings. Changes are saved automatically.
Important: Side-by-side calendars will not work for week or month view in Google Calendar.
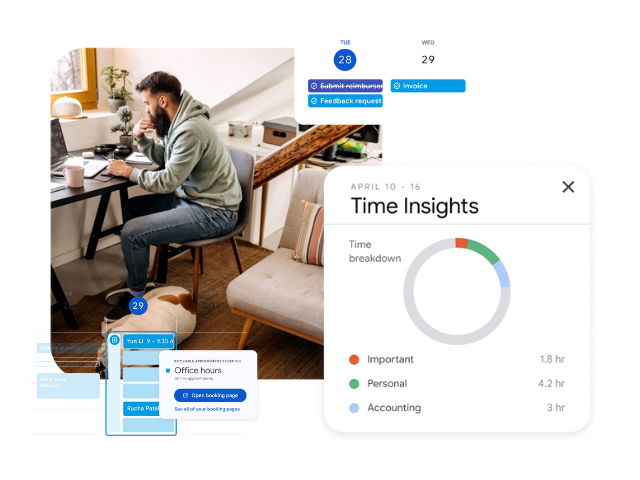
Set your working hours
If you prefer not to be invited to events outside your working hours, you can adjust your Google Calendar settings so that organizers know to reschedule an event for a better time.
- On your computer, open Google Calendar.
- In the top right, click Settings.
- On the left, under “General,” click Working hours.
- Tip: If your administrator has enabled work location, you can click Working hours and location.
- In the “Working hours” section, click Enable working hours.
- Select the days you work and then the hours you work.
- You can split your working hours based on your availability.
- To add more than one time period to your workday, next to a day of the week, click Add.
- To delete a time period, click Delete.

Set your work location
Let people know which days you’re in the office and when you’re working remotely.
Specify work locations
- On your computer, open Google Calendar.
- In the top right, click Settings.
- On the left, under “General,” click Working hours and location.
- Select the days you work.
- Next to each day, enter a work location.
Tip: To indicate your workplace, select a day on your calendar and click the location section.
Manage your event notifications
Set preferences for all your calendars
- In Calendar, click Settings and then Settings.
- On the left, under General, click Notification settings.
- Click Notifications and select an option:
- Off
- Desktop notifications
- Alerts
- (Optional) To set a sound for your incoming notifications, check the Play notification sounds box.
- (Optional) To manage your notifications, on the left, click your calendar and then Other notifications.
- For each option, select None or Email.
- Change preferences for a calendar
You can change notification preferences for specific calendars within your own calendars.
Open Google Calendar.
In the top right, click Settings.
On the left, under “Settings for my calendars,” click the calendar you want to change and then Calendar settings.
Under “Event notifications” and “All-day event notifications”:
- Frequency and method: Define whether you prefer to receive notifications (on-screen) or emails, and how far in advance you want alerts.
- Add notification: Incorporate new types of alerts according to your needs.
- Delete notification: Suppress notifications you no longer require.
Schedule an event with co-workers
Create an event.
- Schedule the event and add guests.
- On your computer, open Google Calendar.
- Optional: To add guests to your event
- On the left, click Find people
- Start typing your guests’ names.
- Optional: To add guests to your event
- Click any time on the calendar that doesn’t already have an event scheduled.
- Add an event title and any event details before Saving.
Tip: To schedule a longer event on the calendar, press and hold the mouse button and drag the cursor down when selecting the desired time block.
Compare guest calendars to find a time.
You can view guest calendars side-by-side when creating an event to find a time when everyone is available:
- Go to Settings
- Select View options
- Turn on the “View calendars side-by-side” option in the day view.
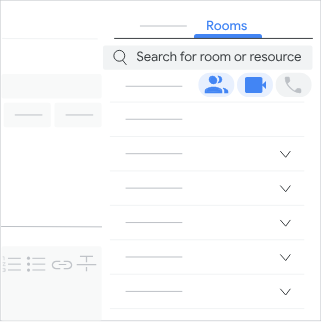
Add a room to an event.
- On your computer, open Google Calendar.
- Create a new event or open an existing one.
- To modify an existing event, select the “Edit event” option.
- Important: If your organization has access to Rooms:
- Click Rooms
- Here you can choose from suggested rooms or search for a new resource.
- Click the rooms or resources you want to add.
- Click Save.
Tip: You can book more than one room for an event.
Attach an agenda.
Calendar can create an agenda for you, or you can attach an existing agenda to your event.
Create an agenda for a new event.
- On your computer, open Google Calendar.
- Create an event.
- Optional: Enter the title, time, guests, and other details.
- Click Add description or attachments
- Create meeting notes
- Save.
- Your meeting notes, pre-filled with event details, are attached to your event and shared with your guests, including those outside your organization.
Create or attach an agenda to an existing event.
- On your computer, open Google Calendar.
- Select an option:
- Click an event
- Take meeting notes.
- Meeting notes pre-filled with event details are attached to your event.
- To attach a document to an event
- Click the desired event.
- Select “Menu.”
- Choose the “Attach a document” option.
- The meeting notes you selected will be attached to the event.
- Meeting notes open in a new window. On the right, click Share.
Add video conferences.
- On your computer, open Google Calendar.
- Create an event or open an existing event.
- For new events, click More options.
- For existing events, click Edit.
- In the event, find the video conferencing field.
- To remove an existing video conference, click Delete.
- To add a video conference, click Add video conference.
- Click Save.
Tip: To avoid joining meetings with expired codes and for better planning of future meetings, check the expiration date of meeting codes.
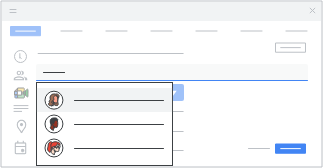
Invite more people to your event.
- On your computer, open Google Calendar.
- Click an event
- Edit event.
- To invite people to an event, type their name in the Guests section and select them from your contacts. If the person is not in your contact list, you can enter their email address to send them an invitation.
- To designate an attendee as optional, locate their name and click the “Mark as optional” option shown next to it, in the People section.
- If the icon is hidden, you can view it by hovering your cursor directly over the guest’s name.
- To designate an attendee as optional, locate their name and click the “Mark as optional” option shown next to it, in the People section.
When you finish editing your event, click Save.
Cancel or restore an event.
Delete an event to cancel it.
If you create an event, you can delete it. This removes the event from your calendar and from the calendars of all other guests.
On your computer, open Google Calendar.
Click the event you want to delete.
Click Delete event Delete.
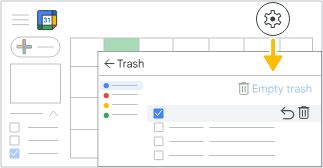
Restore an event.
You have approximately 30 days to restore an event you accidentally deleted.
- Open Google Calendar.
- In the top right section, click the Settings menu
- Click Trash. Here you will find deleted events from this calendar.
- Individual event: Next to the event you want to restore, select the “Restore” option.
- Multiple events: Above the list of deleted events, choose “Restore all selected.”
Respond to event invitations
Respond to an invitation
When you receive an event invitation, it will appear on your calendar. If you are subscribed to email notifications, you may also receive them in your inbox. If you use Gmail, you can respond to the invitation directly from the email.
- Open the invitation email or the event in your calendar.
- Click “Yes,” “No,” or “Maybe.”
- If you click “Yes,” you can:
- Automatically update how you will join the meeting:
- Yes, in a meeting room, when you join from the office.
- Yes, joining virtually, when you join from another location.
- Manually update how you join a meeting:
- Click the down arrow.
- Select your preferred joining method.
- Automatically update how you will join the meeting:
Respond to a forwarded invitation
Guests can forward a meeting link to others. If someone tries to join and was not invited to the Calendar event, a meeting participant from your organization must accept their request. If you receive an invitation via a forwarded email, you have the option to respond directly from that same email.
- In Gmail, hover over the email and click “RSVP.”
- Click your response.
Suggest or review new meeting times
Guests can propose a new meeting time, which the organizer can review and optionally accept.
Propose a new time (as an attendee)
- In your calendar, click the event.
- Next to “Maybe,” click the down arrow.
- Click Propose a new time.
- Select a different time or day.
- Tip: You can also add a message to your proposed time.
- Click “Send Proposal.”
- Note: If you have editing permissions granted by the organizer, you can change the event time directly, without needing to suggest a new time.
Review proposed times (as an organizer)
- In your calendar, select an event that has a clock icon.
- Below “Guests,” find the suggested times.
- Below the proposed time you want to review, click “Review proposed time.”
- To change the event to the proposed time, click “Save.”
How proposed times work
- Proposals are not available for large events (more than 200 guests) or all-day events.
- All guests can propose a new time. Organizers cannot propose a new time.
- On a computer, in Google Calendar settings, if organizers turn on “Event responses,” they will receive email notifications of proposals.
Customize notifications for an event
For an important event you don’t want to miss, customize how you receive notifications, just for that event:
- Open Google Calendar.
- Click the event and then “Edit event.”
- Next to “Notifications”:
- Notification settings: define whether you prefer to receive notifications or emails and how often you want to be alerted in advance.
- To add a different notification: Select “Add notification.”
- To delete a notification: Click “Delete.”
- At the top of the page, click “Save.”
- Tip: You can choose to be notified by email, desktop alert, or both. Changes you make will not affect anyone else invited to the event.